Sunday, November 29, 2009
Tile Redoing
Today we redid almost everything we did yesterday. Yes. It's sad, I know. But Mark found that the tile wasn't set very tightly on the floor, and decided to take all but 4 pieces off. Indeed, these 4 tiles were the only ones that didn't come off way too easily. So today we got some thin set and tried over. It seems to have worked better than the cement, but we'll see. Hopefully we won't have to do it yet again.
Saturday, November 28, 2009
Kitchen Floor Tiles!!
We finally got to work on our kitchen floor. You see, until today, our floor looked like this:

This is because there used to be cabinets over there. Now the corner will house the refrigerator, which awaits patiently in the dining area. Some of the other tiles we had to remove because they got damaged. It's very easy to get them damaged - you don't have to even touch them. But don't get me started on Saltillo tiles - which is what these tiles are. Suffice to say that if you ever consider installing new floors in your house, do yourself a favor and do NOT install Saltillo tiles. Any other floor would be better, I assure you. Anyway, we prepared the floor by removing the tiles and parts of the grout, and now they're ready to accept the new tiles. First, set them up, to see if they look okay:

Now, attach with mortar. We got some cement, and at first tried to use it mixed with sand. Didn't work - it dried out too quickly, and was too tough to squeeze out from under the tile. Since the tile is not flat - neither at the underside nor at the top - you have to make adjustments with the mortar, so soft mortar works better. This is why we had to remove what we started, and do it over, this time without any sand, just straight cement. We found that the tile also needs to be completely soaked, otherwise it would suck up all the water from the cement and dry it out really quickly. Well, this is what it looks like now:

Now we need to wait for it to dry, which should take 1-2 weeks or so, seal it - since it's unglazed tile - and grout it. We also have to do the part under the stove, because the stove is now standing were there used to be cabinets.
When we were done with the tile, we went to the garden and thinned our mustard greens. From the thinning, I made these open sandwiches:

They were good! Mustard greens have a distinct flavor that I like. I tossed them with some balsamic vinaigrette and put them on some lightly toasted bread, topped them with some avocado salad (avocado, diced tomato, toasted walnuts, lime juice, garlic powder, salt), and finished with some crumbled feta. Our first garden crop was delicious!
Sunday, November 22, 2009
Growing Veggies II
Here's how much our veggies have grown in a week! Cool or what?

And the mesclune leafy greens are starting to look like a salad mix!


And the mesclune leafy greens are starting to look like a salad mix!

Growing Veggies
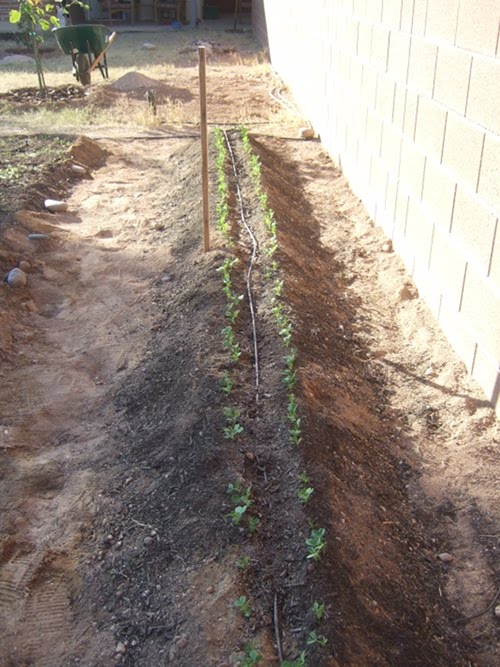
While visiting in Israel I heard that our peas came out, and also some of our lettuces. I couldn't wait to see them! It was so much fun to see green in our little veggie beds!
The following pictures are from last Sunday.

Our peas

Pea close-up

Leafy greens

The mantid lives on the fig
The next post will be of pictures from today, so you can see how much more they've all grown!
While I was gone Mark also made another bed for the herbs, and planted oregano, parsley, chives, and cilantro. The picture I took of that is very blurry, so I'll wait till we get some seedlings to show you.
The following pictures are from last Sunday.
Our peas

Pea close-up

Leafy greens

The mantid lives on the fig
The next post will be of pictures from today, so you can see how much more they've all grown!
While I was gone Mark also made another bed for the herbs, and planted oregano, parsley, chives, and cilantro. The picture I took of that is very blurry, so I'll wait till we get some seedlings to show you.
Wednesday, November 4, 2009
Veggies!
The last couple of nights we spent preparing the beds for the vegetable garden, setting the irrigation, and, finally, planting. Monday night was for the peas - we planted sugar snap peas and snow peas - and Tuesday night was for the leafy greens - mesclun mix, spinach, mustard, arugula, leeks, green onions, and fennel.

Do you think they'll be green by the time I get back from Israel (in 10 days)?
To prepare the beds we basically repeated what we did with the trees: gypsum at the bottom to loosen up the soil, then mixed layers of compost, peat moss and soil.
As for the irrigation, the peas have a dripping hose, and the greens have sprinklers. Note that when the label on the sprinklers package reads "1' to 6'" it means that it actually can barely reach 1.5 feet. Lame!
Monday, November 2, 2009
Three Trees
With sore muscles from Saturday's tree hole digging, we continued with the same motion and kept digging some more on Sunday. This time it was for the vegetable beds. We dug one little trench for peas - 1 by 17 feet, and one for leafy greens and other vegetables - 3 by 17 feet.

Then we went to get trees from the Mesquite Valley Growers Nursery, which happens to be the largest nursery in town. They have a huge selection of everything, and they got very good reviews. Indeed, they helped us find the most beautiful trees:

The farthest away, by the shed, is a semi-dwarf redblush grapefruit tree. This means that it will only grow to about 12 feet. On the left is a Janice Seedless Kadota fig tree, whose fruits were rated best-tasting at a 1996 Dave Wilson Nursery fruit tasting. And at the front - hopefully the largest tree, so its canopy might shade the office in the hot summer mornings - Fuyu persimmon! I always thought I hated persimmon, but I guess I just never had good ones. We recently bought one to try, and I realized that it is an absolutely delicious fruit. I can't wait to try ours!
Before sticking the trees in the ground we put some (2") gypsum and mixed it with the hard bottom of the hole. This is supposed to soften the soil. On top of it we layered compost, peat moss (for increasing the acidity), and the original soil, mixing the layers as we went. It took about an hour to finish each of the trees. We did the same with vegetable beds, one of which, the little one of the peas, you can see in the tree picture above. We ended up working on it in the dark, with only the moon and the measly porch light to show us what we were doing.
Subscribe to:
Posts (Atom)