Yesterday was arguably the coldest day of the year. Did we cuddle on the sofa with our Cuddlies and a nice cup of hot chocolate? No. The result of what we did you can see in the picture below.
To be exact, that's actually the result of prior days of work. We started on Sunday, but it was kind of late, so we only got to remove 4 rows of tile, that is 48 tiles. Tuesday we removed a lot more: 140. Yesterday we removed everything else - that means another 184 tiles. As you can see in the picture, some of the tiles were laid on a vinyl sheet floor, which made it a lot easier to remove. There were some tiles that were almost impossible to remove, and instead we had to scrape them off, in a process not unlike carving in stone.
Needless to say, Mark did most of the work, but I also helped as much as I could. We got me a lighter drilling hammer (only 2.5 lb, as opposed to the 4 lb Mark was using) and I managed to remove with it quite a few tiles.
It was a long day of hard work, and it kept us warm. When we finally finished we were completely dusty and all of my muscles were exhausted. Just opening and closing my hand to a fist was painful. My left shoulder was crying for help. But after a good night sleep, all the pain was gone.
We now have a mountain of broken Saltillo tiles in the back yard. We'll see if we can do something with larger pieces - maybe use them as pavers.
We still have to scrape off all the thinset that was not removed completely with the tiles. Some of it is extremely stubborn. Hopefully we can finish that tomorrow, so our floor will be ready for some new tiles.
Friday, December 31, 2010
Sunday, December 19, 2010
Why So Quiet?
It's been a long time since I last wrote about our work in the house. This is not because we haven't been working. Though we did slow down quite a bit, we also did accomplish a thing or two.
First, we finished the windows. After installing the windows, we needed to plaster around them, caulk inside and outside, prime and paint the plastered area. So we did that, and with the exception of the bedroom, where we still need to paint (the problem is the paint for the bedroom no longer exists! But we will paint it with a similar paint and pretend it was intended), we finished everything.
Outside, we needed to take care of the garden: remove summer plants and plant winter plants. We planted snow peas and sugar snap peas, spinach, kale, lettuce, artichokes, and maybe a few other things that I can't recall. The peas seem to be doing fine, but we'll see what else grows in the future.
We also bricked the path from the driveway to the house, where there used to be a large, dangerous blob of concrete.
In addition Mark did lots of relatively small projects, such as caulking around the roof to prevent crickets from getting into it, and adjusting the seat of the AC on the roof.
Back inside, we started painting the office, and we still have 1.5 walls left, but that can wait.
We are still in the process of deciding what to do with the floor.
First we decided to get rid of the Saltillo tiles and put something else. Then we realized that it will be a lot of work. So we thought maybe we can clean them. However, an expert tile cleaner came over and said the oil stains will not be removed. Well then, what's the point of cleaning? We decided again to rip them off. It's going to be a lot of work, but I don't think we have any other option at the moment. We have to decide what to put instead of Saltillo. One option was hardwood floor, leaning toward stranded bamboo. The other option is tile. At the moment we are seriously considering tile because it will probably be easier to install and be a lot cheaper. I also think it will befit the house better, because it already has lots of wood, and it's harder to match another one that will go along with the existing wood, without being exactly the same.
Hopefully the process will be done in a few weeks...
Now, about Saltillo tiles. These are non-glazed ceramic tiles that are intentionally uneven and non-leveled. They are supposed to be sealed every 6 months to a year, depending how used the area is, and how good the sealer is. Of course, our tiles were sealed with the worst sealer ever. It doesn't seal at all and is impossible to strip, which is what you're supposed to do if you want to remove the stains. If a peanut falls on the floor - it's stained for life. It is also easily chipped and cracked. Possibly the worst floor option one could ever make. It might look nice in the beginning - as all the visitors to our house indicated - but it's bound to look bad eventually - and eventually doesn't take long to arrive.
Monday, September 20, 2010
Our first (and probably last) watermelon
We had many watermelon babies, but then, to our disappointment, they blackened and shrunk. Only one, probably due to the protection of the lettuce forest, grew to a significant size.
It is very sweet, too.
We are also enjoying the other veggies that manage to somehow survive the heat, though there aren't many of them...
This picture is from a while ago, and it features some of our biggest veggies. The more recent tomatoes were the size of blueberries, as the plants withered, and by now they have completely succumbed to the heat.
Saturday, July 24, 2010
Windows
In the last couple of weekends we've been working on installing the new windows got. We started on the weekend of the 4th of July - exactly one year after we moved in. Boy, do these things take time!
We wanted to install the windows much earlier. During the cold nights of winter (it does get cold here in the desert, you know) we could feel the coldness getting through single pane glass sheets of our metal windows. Zero insulation. Mark looked up dozens of window makers, and finally chose Clear Choice. On the day removed the window that used to open to the garage, the window person came and took final measurements and half the payment. Yes, it was on the 2nd day of January! He said it would take a couple of weeks. Then, when Mark called to inquire about it 3 weeks later, they said it would take another week or two. Then he called again, and they said "next week". Then he called again, and only got an answering machine. When he tried to file a complaint he found out that the Tucson office closed. We still wanted the windows, so we tried contacting the main office - no answer! Damn!
All of a sudden, dozens of complaints appeared on the BBB regarding Clear Choice. They weren't there before - all unhappy customers that didn't get their windows. We decided to file a claim on the credit card to reverse the charge for the windows. It took 60 buisness days, but we finally got our money back, since they didn't hear a word back from the window company.
Well, then we had to look for another window company. This time we went with Window World. It took longer than they said for the windows to arrive (about 4 weeks) than the time they said they would (2 weeks), but they finally arrived, as I said, in the beginning of July. Yeepee!
Our new windows in the garage - waiting to be installed
So every day on the first weekend we worked on one window. It's a lot of work: First you have to removed the old window, which is never easy - it is attached with nails that are not always in their designated holes. Sometimes there's more than one nail per hole. You have to scrape all the caulk and paint and other gunk that makes the window really stick to the brick. Then you have to carefully, without hurting yourself, remove the window (they're heavy!) and carry it away. The most time consuming part, though, is leveling the openning - scraping all the plaster, cutting the metal sheath under it in the upper part of the openning, and scraping off the bulging parts of the bricks. Next, you fit the window, make sure it's level, drill some holes, put some anchors, and screw it in.
I didn't mention the ceiling fans we installed, ha? That was quite an achievement in itself, including permit requirements, running cables through walls, etc...
Same window, from the inside - a lot better at keeping the heat outside!
Finally, insulation and caulking. We finished 8 out of 9 windows in 2 weekends! The last one is a tiny bathroom window, so it doesn't count :)
Oh, but we still have to plaster. Again! Will this ever end???
Sunday, May 23, 2010
The Enchanted Lettuce Forest
This picture was taken a week ago. Since then a major deforestation event took place (the fennel forest was uprooted as well, and basil was planted instead). We still don't know what will come instead of the lettuces and the spinach.
Cilantro is next on our uprooting agenda.
It seeded and is now dead. The seeds were collected, and we will plant a few of them soon.
Sunday, May 2, 2010
Small Projects in the Kitchen
Our kitchen is mostly done by now (as you'd expect!!), but it's still not completely done. That will only happen years from now, when we've replaced the tiles (well, I hope it'll be sooner than that, actually, and more about the tiles some other time - it's a LONG story!). But in the meantime we've managed to do some things, like install all the cabinet doors, install the cabinet hardware (you know, drawer pulls and little knobs. Other projects took more time, like the AC vent that comes out of the over-the-range cabinet. Last time you saw it, it probably looked like this:
We had to cut the door on the right side to fit under the shaft. We also put some boards around the shaft, so we can later attach the grill onto them:
You can see the doors and knobs here, too!
Then we had to paint the grill, because, for some reason, they only come in white! (or some ugly brown, but not for the size we needed). Spray-painting is much harder than I thought. You have to apply just the right amount to cover everything, but not too much to make it run. I can't say I succeeded, but since it's hanging up above the microwave, it looks mostly fine:
Besides that, we also installed lights, and now our kitchen is a lot better lit! We replaced the little fluorescent light in the kitchen that was hanging perpendicular to the kitchen layout, thereby not lighting a lot of the counter space. Instead we got a much longer fluorescent light that hangs parallel to the kitchen layout, and lights up most of the kitchen without much help from any other light.
We also removed the old '50s-style chandelier that was hanging in the dining hall:
And instead put an oil-rubbed bronze chandelier, that goes nicely with the ceiling and our kitchen faucet and cabinet hardware:
With fluorescent light bulbs, of course!
Monday, April 19, 2010
Garden Snippits
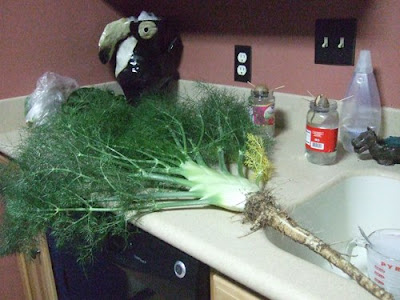
Last weekend we had our first fennel! It was ginormous!
I roasted it with some olive oil and balsamic vinegar. It was good, but a bit on the dry side. Next time I will try roasting it covered up.
This weekend we noticed that the persimmon has flowers! Lots of them, too! They are very pretty:
In addition, we transplanted the plants in the greenhouse. Unfortunately the artichokes did not survive the heat when we left the greenhouse closed during the day we went to Tempe about a month and a half ago. Some of the tomatoes were affected as well, as were the eggplants, but most of them seem to have recovered. Especially recovered are the tomato plants that got transplanted on the weekend of April 2nd.
We also planted some herbs (lemon verbena, mint in the backyard, rosemary in the front yard), cucumber seeds, melon seeds, and some sunflower seeds. The melons were planted where the peas used to be - I can't believe we still have some fresh peas! They don't taste quite as good as the earlier ones, and they are the last ones, but we have more that we froze.
Tuesday, March 23, 2010
Spring!
You can tell Spring is really here:
New leaves on the fig tree!
Our first fig!
New growth on the grapefruit tree!
Leaf buds on the persimmon tree!
This past weekend we almost finished preparing the summer garden for planting: dug another bed, for a total of three, and installed part of the irrigation. We also planted the thyme in a smaller bed, to which mint and lemon verbena will be added at a later date.
Finally, we planted some summer wildflower seeds in the front yard. Hopefully, we'll have a colorful summer!
Sunday, March 14, 2010
Greenhouse Plants, Etc.
Last week, when I took these pictures (I know, I'm lazy), our garden turned 4 months old. It has provided us with many peas, arugula, mustard, and spinach. Actually, it was a lot more arugula and mustard than we could handle, so we took them out. Plus, they had tons of aphids. It was neat to see some biological control agents coming to the rescue - ladybugs, parasitoid wasps - but I took them all out. We really didn't know what to do with all that mustard, and the arugula, when not young and tender, is too strong for my taste. We also had arugula and mustard, as well as endive in the mesclun salad mix, so we took them all out, finding little lettuce plants struggling for some air and light. Well, they have plenty of both now!
The area between the struggling lettuce and the green onions, where the arugula and mustard were, now features little lettuce babies, planted 2 weeks earlier:
The greenhouse plants are doing pretty well too:
Four artichokes, 8 bell peppers, 2 eggplants, and the rest are various varieties of heirloom tomatoes.
Even though we didn't really have any below-freezing days since I built the greenhouse, I like to believe that the greenhouse helped these plants grow. As I mentioned before, these pictures were taken last week, and now they are even bigger. Plus, we also purchased another pepper plant and a thyme plant from the Tucson Organic Gardeners Sale last Sunday. As you can see, some of the seeds didn't sprout - 2 of our Taos tomatoes and 3 of the bell peppers. We resowed them yesterday. We also removed most of the doubles and triples to leave a single seedling. The recommendation is to transplant them sometime between mid to end March. I think we will wait until they're a bit bigger to do that, though 2 of their beds have been ready months ago.
Yesterday we dug another little bed for some more herbs we are planning to grow: mint, thyme, lemon verbena, and anything else that will strike out fancy.
If you are interested in spinach, parsley or cilantro, let me know - we have way too much!
Sunday, February 7, 2010
Greenhousette
Yesterday, while Mark was fixing the skylights, I finished building - all by myself! - the little greenhouse we're going to use to grow seeds. I started last Sunday, when I built the frame, and yesterday I painted and attached the plastic sheet and the hinges:
I'm happy to report that the greenhousette passed its first rain test - it rained a lot this morning, and yet the greenhouse was unharmed (albeit very misty).
The longest dimension is about 2', and it's only meant for holding small pots with seedlings. I planted some today - artichokes and bell peppers. We're also supposed to get seeds of seven heirloom tomato varieties in the mail. I can't wait to taste them!
This is what it looks like open:
You can see how the sugar snap peas are going wild. Here's a picture of the main winter garden as it reaches the ripe old age of three months:
The empty-looking part in between the mustard greens and the fennels occupies the green onions and leeks. I sure hope they will grow some more...
And this is not all of the peas I could have picked (it was getting dark):
Peas Now! [snow peas on the left, sugar snap peas on the right]
Sunday, January 31, 2010
Lots of Diggin' and A Compost Bin
The past week we spent the evenings digging till our backs broke and our arms would put Marge Simpson to shame.
Apparently, Marge was into body-building at some point (more specifically, during an episode called "Strong Arms of Ma").
This is not a WWI battlefield... it's our front yard, with the main water line exposed.
The reason we were digging so much is that our drain clogged. Since we'd have to bring a plumber to unclog it, we figured we might as well also prepare for the replacement of our old, rusty main water line.
We're having some trouble with the permit issuance for that, so we'll have to wait with this project a couple of days, but we did get our drain fixed. Lloyd came Thursday morning, in the pouring rain, and put his snakey machine through the hole in the drain, that we exposed the night before:
Unfortunately, the hole is right under our herb garden. Poor chives, they suffered the most, and they're still so young and tender, you can barely even see the ones that were spared. Yes, they're in between the parsley and cilantro (coriander).
And now for something completely different:
We started piling our kitchen and garden scraps back in December or late November. But the pile was getting so big, we had to do something to contain it. So we built this 3-faced compost bin out of wood and chicken wire. The extra green is from our mustard bed - it's been going wild, and so have the aphids, so thinning was unavoidable. Encouragingly enough, I did see a ladybug too, so there is at least some measure of biological control.
Friday, January 29, 2010
Plastering and Eating
Two weeks ago we started plastering the bricks on the closed window. Then we ran out of plaster. We had enough for 3 layers of plaster mixed with sand, but not enough for the last layer of pure plaster, for a smooth finish. So we finished that a week later. Now all we have to do is prime, paint, and put some shelves. We'll see how long that'll take...
The same day we finished the first few layers of plaster, Mark made this pizza:
He made this pizza many times before, and it's always delicious. But this time it was extra special, because he used spinach from our garden! And homemade yogurt! Yum!
And last week we had our first crop of snowpeas!
The yummy green pods went straight into our yakisoba! Yum!
Wednesday, January 6, 2010
Windows XP Removed
(XP stands for Extra-Professionally)
Our house didn't use to have a garage, but a carport. Sometime along the way the carport was converted to a garage, but the windows to the dining area and the bathroom remained. This is not up to code, according to our inspector, so we have to remove the windows and brick them up. We decided to do it now, because we are also getting new windows, and they will cost $450 less if we remove the old windows ourselves. The window that needs to be bricked, is therefore, the practice window -we can see how it goes, and decide whether we would like to pay someone else $450 for the pleasure or not. Turns out it's not so difficult! Sunday Mark removed the window in about 1 hour, and that included finding hidden nails, and dealing with the fact that the window didn't open all the way, because of the garage door tracks that run across it. Now that we know there are nails on both sides of the window, and as all other windows open all the way, it should take less time per window, we hope. The window person, who came to measure the windows, was very impressed!
Mark bangs on the sides of the window to loosen it up.
All the nails are out, and the window can finally be pulled out.
Next, we had to brick it up. But first we had to find bricks. We wanted to use burnt adobe bricks, to match the rest of the house. You'd think it would be easy to find in Tucson, but no. The new adobe bricks are made differently - they're more stable - and the one place that sells them, although they said they have bricks with a color that matches - was too busy to help us. We finally found a place that sells burnt adobe way out west - Walter's Wholesale Mesquite. They mostly sell firewood, but they also have adobe bricks of various sizes. We wanted 4" wide bricks, so that we can have a little niche for built-in shelves -- the house bricks are 8" wide. We got 50 of them and started laying them. Six hours later:
Mark reinforced the bricks with reinforcement bars drilled into the bordering walls. It was already 11 pm and we ran out of sand, so we had to close the rest of the window with some cardboard and continue the next day.
Monday, 8:30 pm, after acquiring more sand and cement, we started again. Five and half hours later (yes, it was 2 am when we were finally done!):
From the inside: the bricks will be painted, and shelves will be hung to show our smaller ceramic creations.
From the garage side: as you can see, the garage door tracks didn't make it any easier laying the bricks in the last couple of rows. Also, not that the new brick sizes are different - they are shorter both in length and height than the original bricks.
And on a different note: On Sunday our garden veggies turned 2 months old:
The snap peas are blooming!
Copious amounts of mustard, arugula and salad greens result in a lot of greenery ending up in our meals.
Subscribe to:
Posts (Atom)